My fascination with natural dyes continues with an eco-printing project. Eco-printing is the process whereby the colourful dyestuffs of plants are impressed onto paper (or fabrics). Firstly, the paper has to be mordanted with metallic ions, which form a chemical bond to the fibers. Plants are then layered between the paper and heat is applied to release the coloured chemicals and fix them to the mordants, thereby creating the print. This guide summarises my findings so far and will continue to be updated as I learn more – I’m still very new to the art.
Paper Selection
The choice of paper heavily affects the final outcome of the print – especially how defined the image is. Variables include the weight, sizing and composition. The main paper I currently use is Daler Rowney Find Grain Cartridge 160 gsm, which was available at a large office supplies shop. The best way to select a paper for eco-printing is by simple trial and error, with the following considerations in mind.
Weight is usually measured in grams per square meter (gsm). The paper I currently use is 160 gsm, which is around double the weight of normal printing paper. A thicker paper is required to survive the harsh treatments of the ecoprinting process. I find that at 160 gsm, the paper is also flexible enough to conform around the pressed plant and maximise contact. I will also experiment with heavier weight papers in the future.
Size refers to the substances incorporated into paper to influence its tendency to absorb water. Size can be applied either internally, whereby it is mixed with the paper pulp itself, or externally when it is coated on the surface. An unsized or weakly sized paper soaks up water readily, akin to a paper towel, and is unsuitable for eco-printing as it readily diffuses the dyes and makes for a fuzzy print. The paper I selected was suitable for calligraphy, sized just enough to accept ink without diffusing it, a property also desirable in eco-printing. I have not tried heavily sized or surface sized papers (like water colour paper).
The composition of most modern papers comprises cellulose in one form or another. Sources of cellulose can include cotton, purified wood pulp or other natural fibers. The paper I use doesn’t specify its source but is probably wood pulp derived. I’m interested in trying different kinds of paper compositions to see how the properties affect the print.
Mordanting
Mordants are metallic ions and tannins that create a bond between the dyestuff and the fiber. Notably, the choice of mordant heavily affects the colour and fastness of the print. Mordants can be applied before or after the dye transfer (referred respective as pre- and post- mordanting). For my current process, I pre-mordant the paper with aluminium acetateprior to eco printing, with an optional iron sulphate post-mordant. Aluminium mordants usually brighten and intensify colours, whereas iron darkens and dulls them.
I use aluminium acetate, mainly because I had it on hand and it gave me good results, although alum (potassium aluminium sulfate or aluminium sulfate) is also used for paper marbling. After mordanting, excess, unmordanted aluminium acetate and acetic acid should be neutralised with a brief soak in a saturated solution of calcium carbonate. Calcium carbonate also raises the pH of the paper (important in developing yellows for flavonoids) and adds a pH buffer against acids, which are known to degrade paper over time.
The following steps have given me good results although I have not experimented with optimising quantities or times.
- Prepare a 1g/L working solution of Aluminium acetate in room temperature tap water. The working solution should be prepared fresh as it readily precipitates. I prefer to prepare a stock solution at 1g/mL (above saturation point) and dilute as required.
- Soak the paper in the working solution overnight at room temperature.
- Prepare a saturated solution of calcium carbonate in room temperature water. Around 1 tsp per liter should be sufficient as the substance is barely soluble.
- Transfer the aluminium acetate soaked paper directly into the calcium carbonate bath and soak for a minute or so, moving the paper every so often to ensure even contact with the solution.
- Remove the paper from the calcium carbonate bath and transfer to a flat surface to dry.
The mordanted paper can be stored after it is completely dried.
Eco-printing
Eco-printing basically involves sandwiching plant material between paper and applying heat to transfer the dyes. The goal is to provide even pressure and good contact between the plant and the paper. Through trial and error, I have come up with the following stacking layout: Marble slab – corrugated cardboard – six layers of paper hand towel – mordanted paper – plant material – mordanted paper – six layers of paper hand towel – corrugated cardboard – marble slab.
I chose the marble slab because it is (relatively) inert and heavy, so the weight of the marble itself provides sufficient pressure to press the plant onto the paper. Another option could include tiles bound by rubber bands (anything flat and rigid with compression force should work).
The cardboard layers provide a gap between the marble and the paper layers. I found that without it, water pools onto the marble, making the paper excessively wet and causing the print to run.
The paper hand towel absorbs any dyes that leach through the printing paper, reducing blotching. It also provides padding around the printing paper, allowing for better contact with the plant material.
For the actual printing:
- The printing paper is rinsed in tap water briefly to remove any excess calcium carbonate and to moisten the fibers.
- Excess water is dripped off and the printing paper is placed directly onto the paper towel layer (Note that some papers might have a front and back side with different textures/properties). Any pooled water on the surface should be blotted off.
- The sundew leaves are arranged onto the paper – don’t worry about rinsing off the mucilage as it doesn’t impart colour.
- The rest of the stack is then assembled and placed into a bamboo steamer. The stack is steamed for 90 minutes over a gently boiling pot of water.
- After 90 minutes, remove the steamer from the pot to cool down. After cooling, the print is complete. Leave on a flat surface to dry.
- (Optional) If the colours are too dilute, dipping the print into a weak iron sulfate post-mordant solution should darken the dyes considerably (note that iron also dulls the colours). After post-mordanting, rinse the print briefly in a calcium carbonate bath, followed by water.
Results
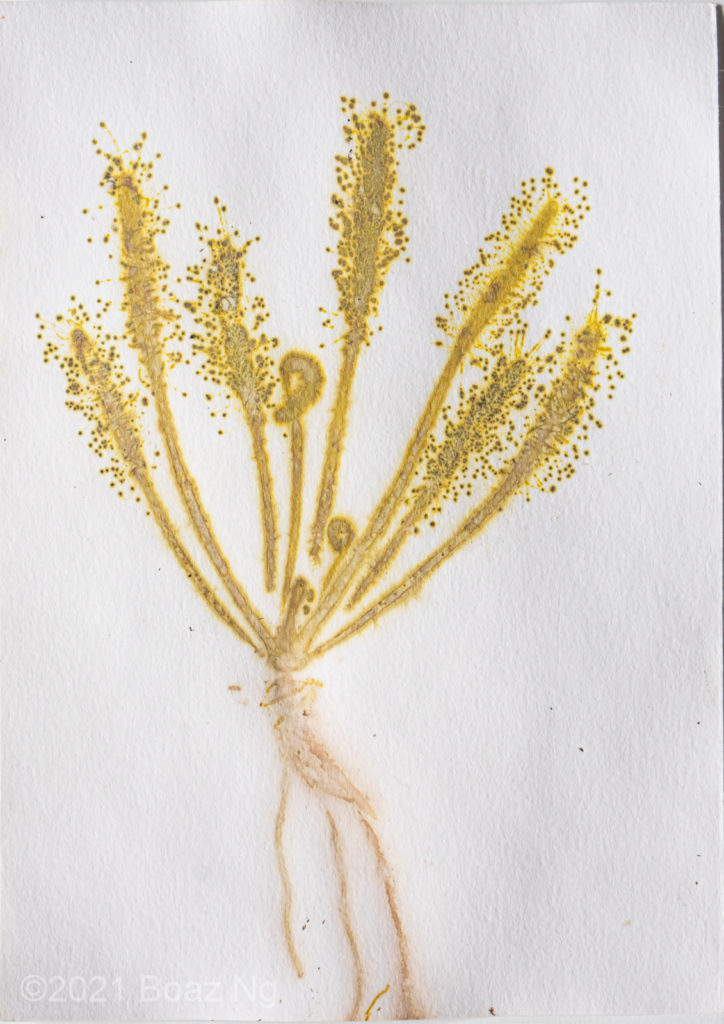
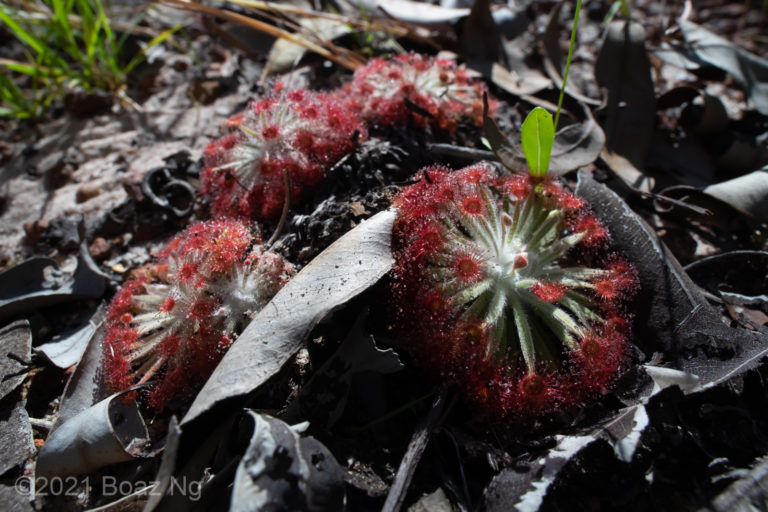
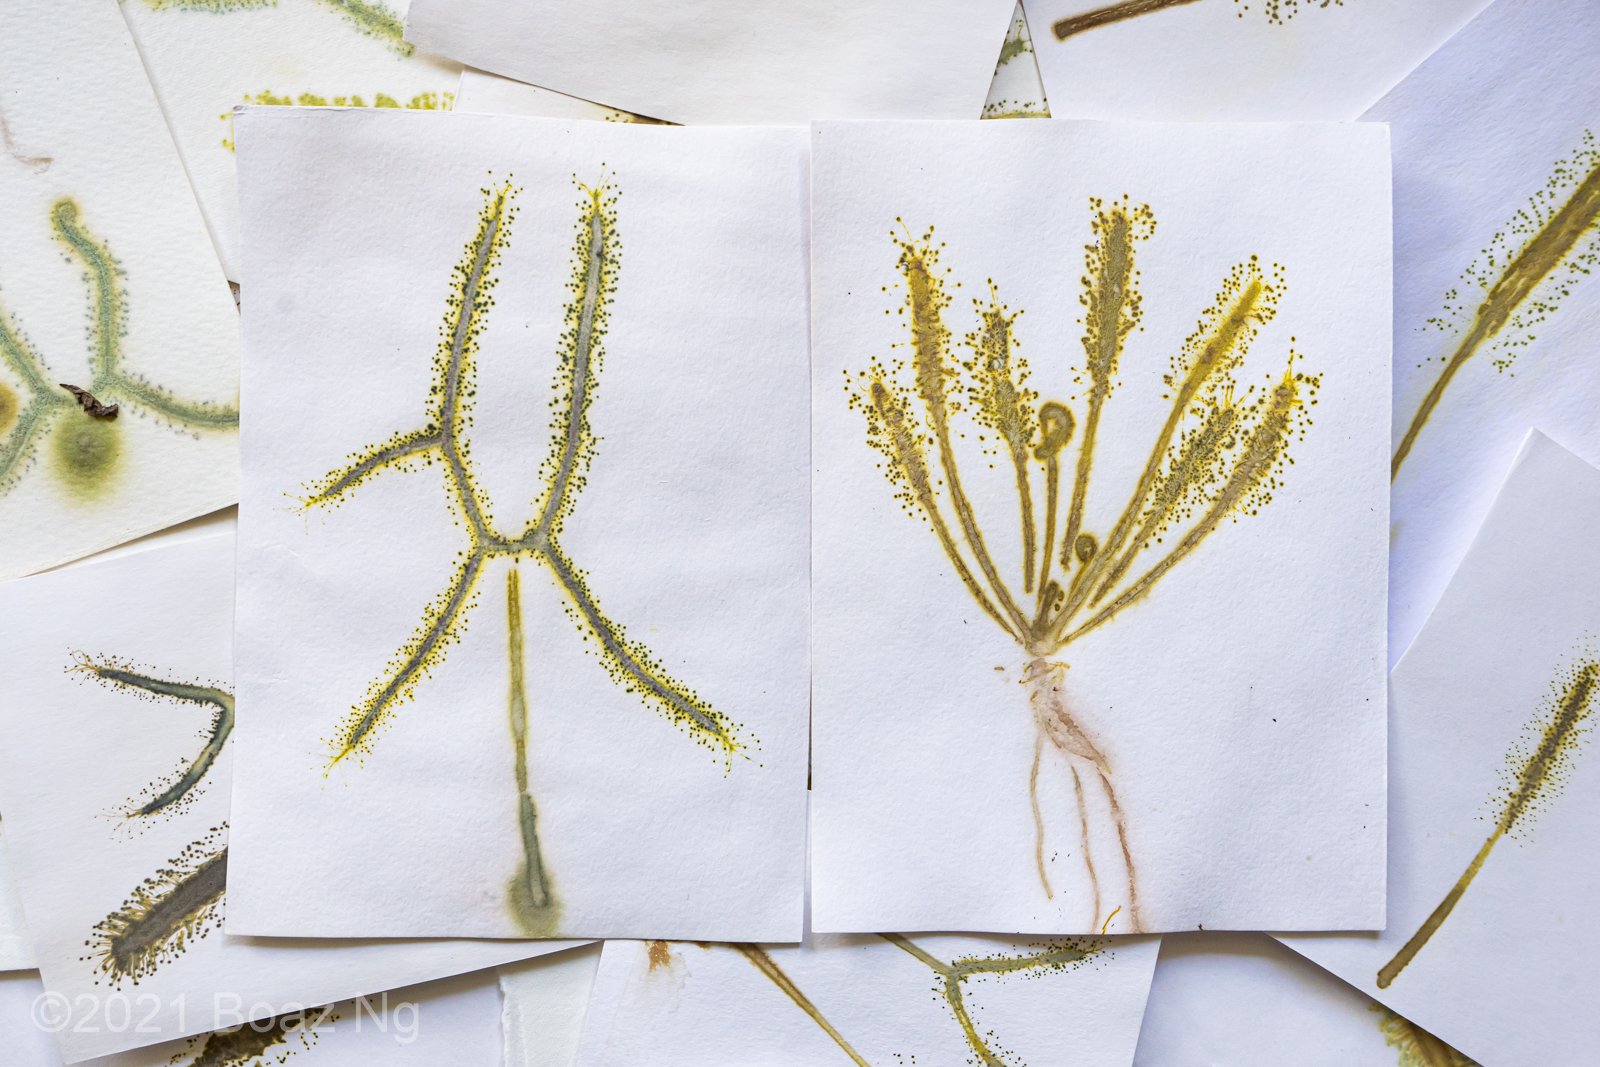
I’ve had the best success with Drosera binata and Drosera capensis, both of which are rich in flavonoids that print a brown-yellow colour that is particularly luminous under bright white light. The glands of both species develop a deep green colouration. The dense, small glands at the center of D. binata leaves makes the paper in contact with the front of the leaves plant particularly attractive, as it imparts a deep and detailed print. For D. capensis, I prefer the back side of the leaves, as it results in a yellow outline that is fringed with the dark speckles of the glands. The roots of D. capensis have a orangy brown colour instead of yellow. It remains to be seen how permanent the colours in these prints are but for now I’m very happy with the result.
I’m excited to eco-print more plants and see what creative outcomes I can achieve.
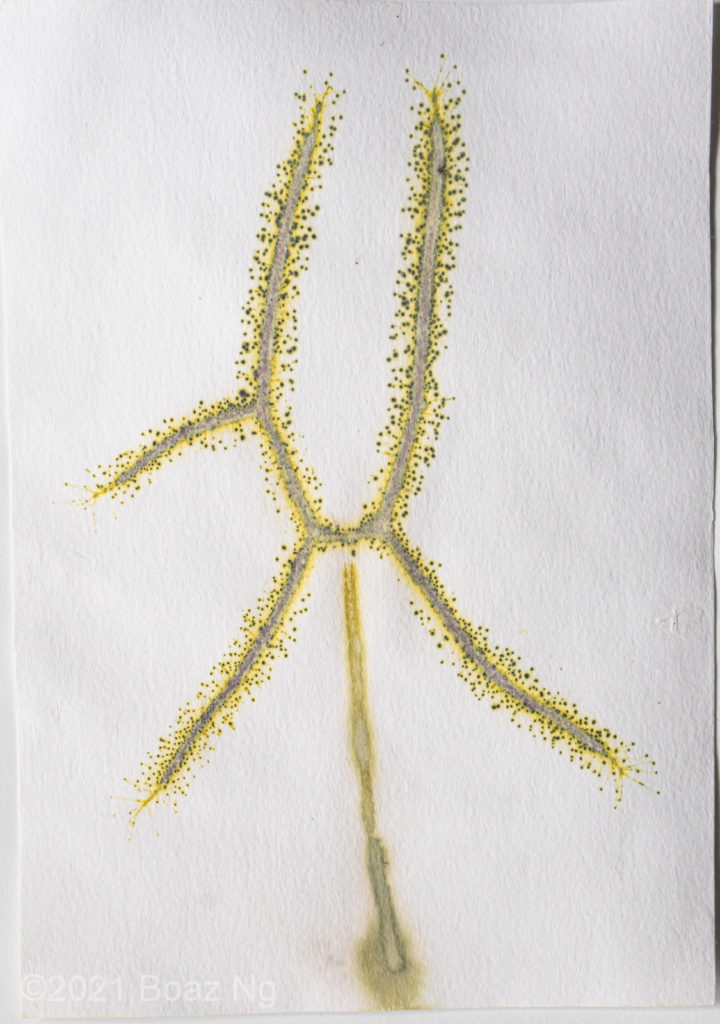
Front side print 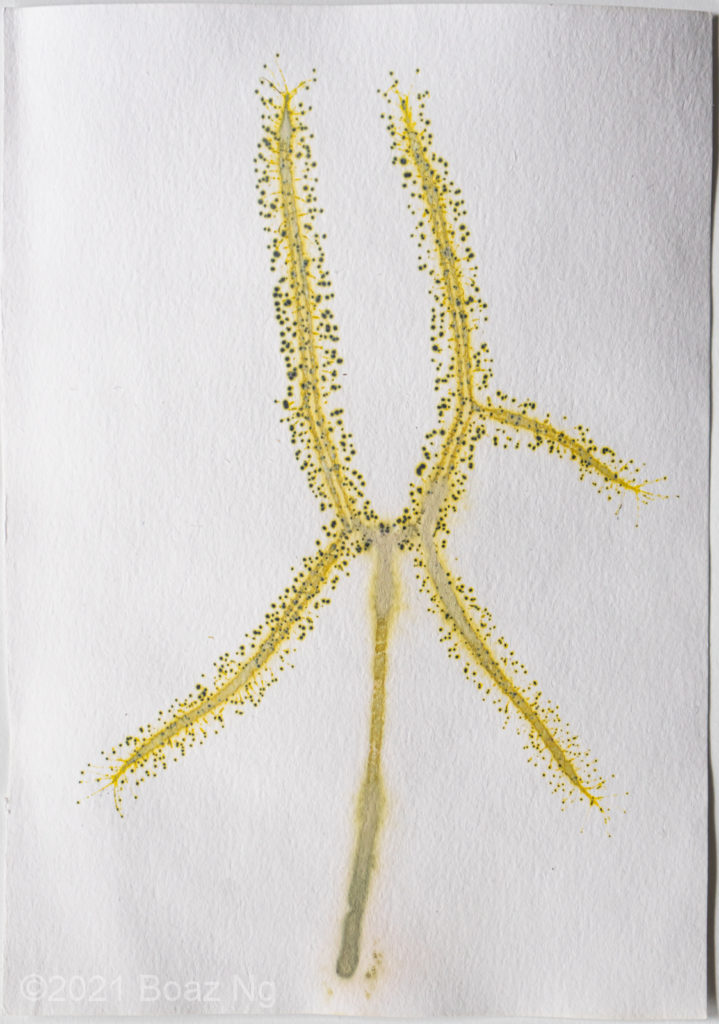
Back side print